Home | Model Making | Writing | Photography | Biography | Contact | Links | Blog
This is the original build article I wrote for this kit back in '99 or so. The photos are with my old Kodak dinosaur digital camera. The very last photo on this page is brand new with a much higher quality Canon G2.
For those of you who do not know, Boba Fett is a character out of the Star Wars trilogy. This is a kit I started years ago, but it got pushed into the background (like the rest of my models). Let's follow the progress, shall we? This first photo shows the parts of the kit.
The Popsicle sticks are for manipulating the parts while I'm airbrushing them. I plan on painting most of the parts before assembly on this kit, as the kit is posed with both hands holding his rifle. It would be a bit tricky, for me at least, getting all the parts of both arms to come together at the correct spot if they're assembled first. (And, yes, I know I need better lighting for taking photos. I'm a workin' on it).
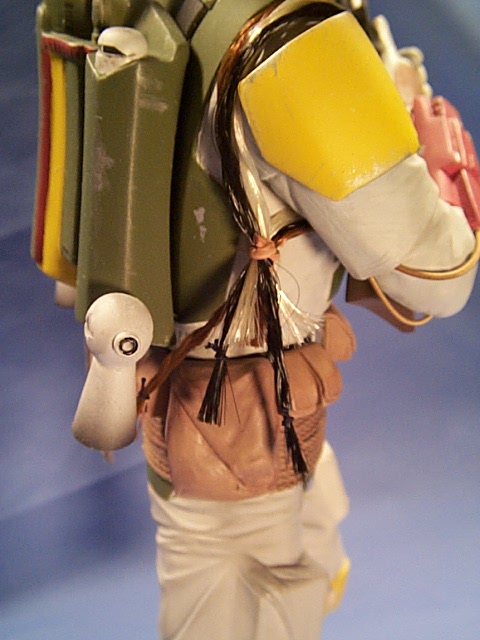
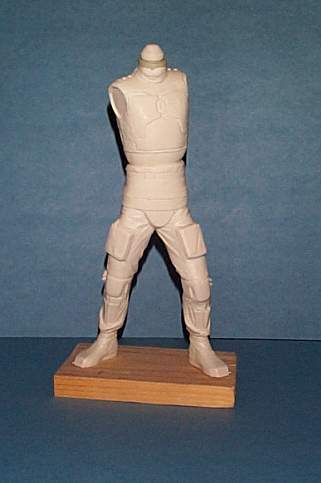
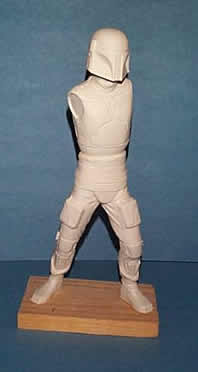
This is Boba's main torso, which I've already assembled. Boots glued to legs, legs to torso. I placed bolts in the bottom of the feet, to secure it to the temporary wood base (and the eventual final base). The whole assembly was then filled with plaster to give it some weight and prevent the sagging vinyl kits are known to go through. The dark gray at the top of the neck is a little addition I added in, I thought he looked quite turtle-like with the neck being as short as it was. On the right side of the torso I also removed the molded in Wookie scalps, which will later be replaced with braided theatrical hair.
The same shot of the body with the head attached. The Boba de Milo.
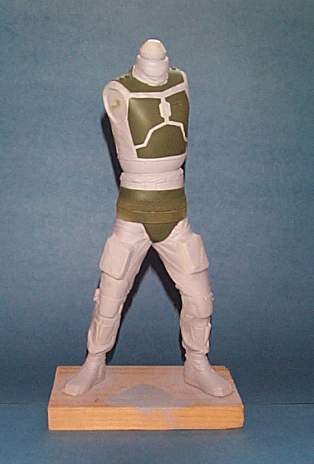
The green paint laid in on the armor. Also did the helmet and backpack at the same time (just didn't think to photograph them). Initial impression on my part is the gray is too light, but I'll wait until the rest of the colors are laid in before I start adding dark washes to the jump suit.
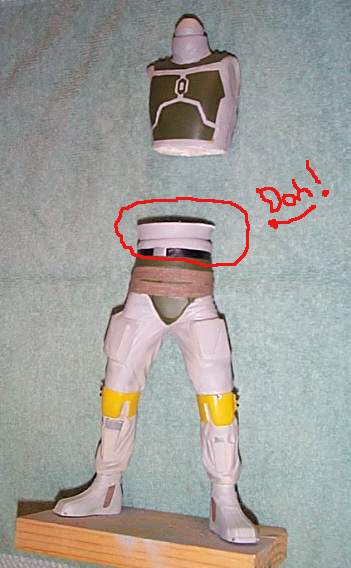
Okay, here's one of those cases where I say over and over to myself "Why didn't I notice this before?", as I repeatedly kick myself. Basically when I glued this kit together several years ago, I didn't trim quite enough out of it! Fortunately, a little quick surgery removed the offending piece.
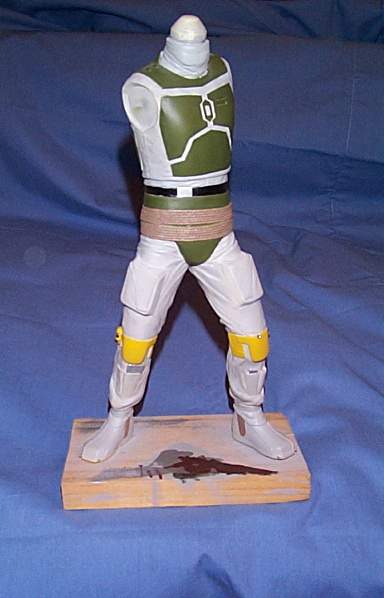
Here he is glued back together, after the little "stupidity detour". Looks much better, I always thought he looked a little too tall.
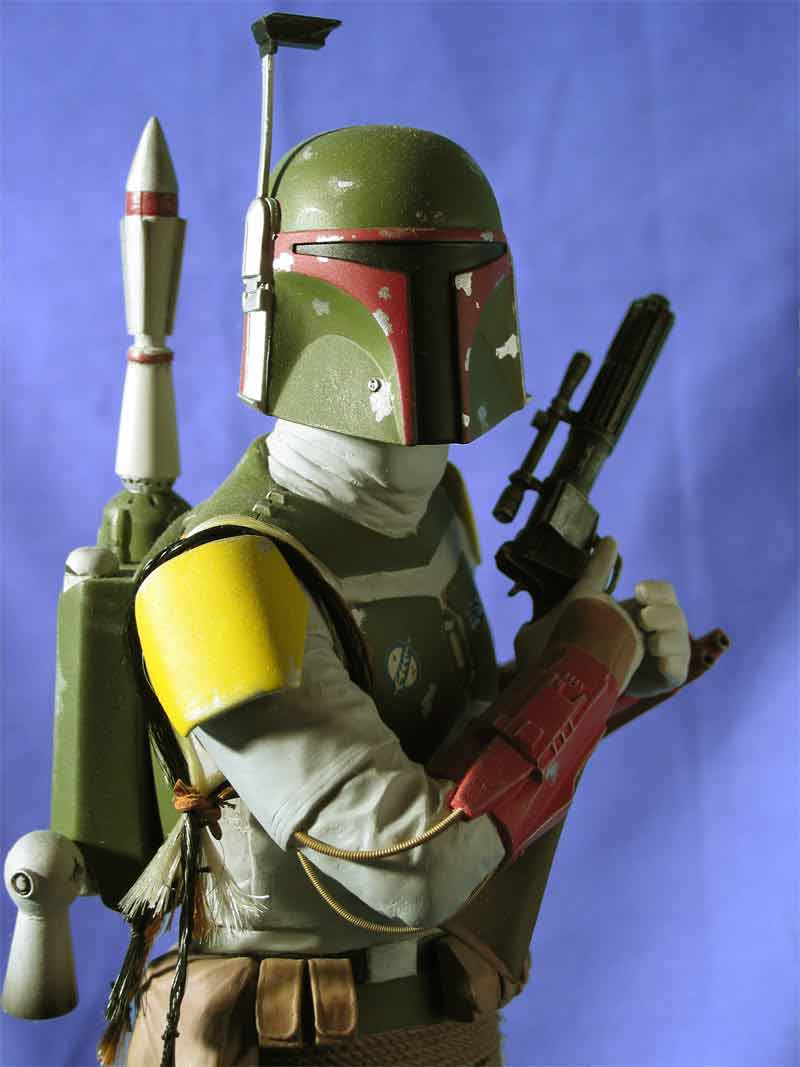
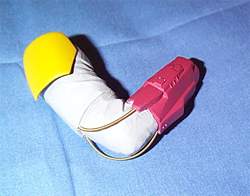
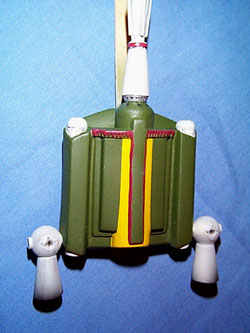
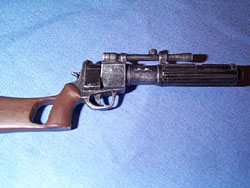
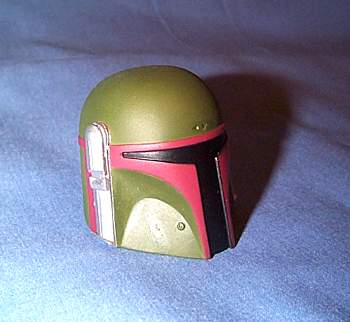
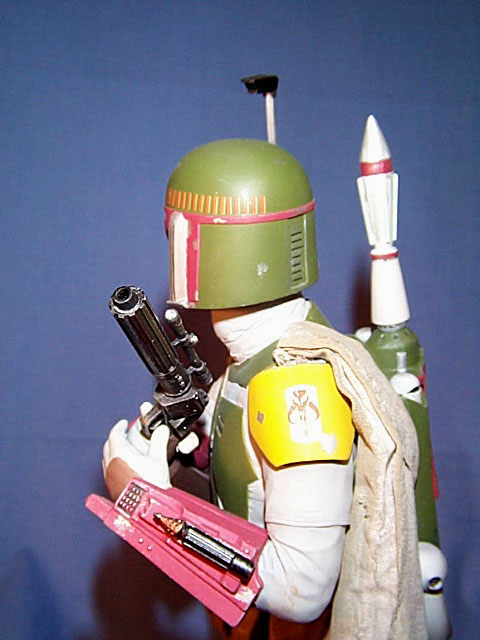
At the same time, I was working on the other pieces, namely the arms, helmet, gun and backpack. Some "quick and dirty" shots of those parts before attachment. The cable running from the gauntlet up into the arm is guitar string.
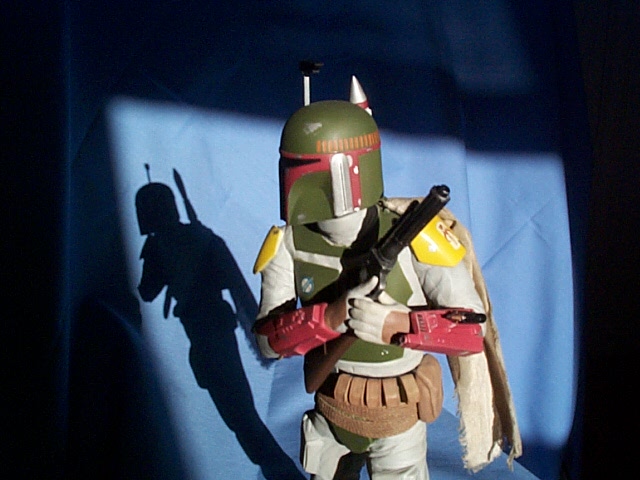
A little more glue, swearing, touch up, etc. and we arrive at the basically finished figure, waiting for the final weathering.
Next the decals are added, and then some weathering...
The cape is flour sack cloth, folded over several times, and then painted with multiple thin washes of acrylic tan.
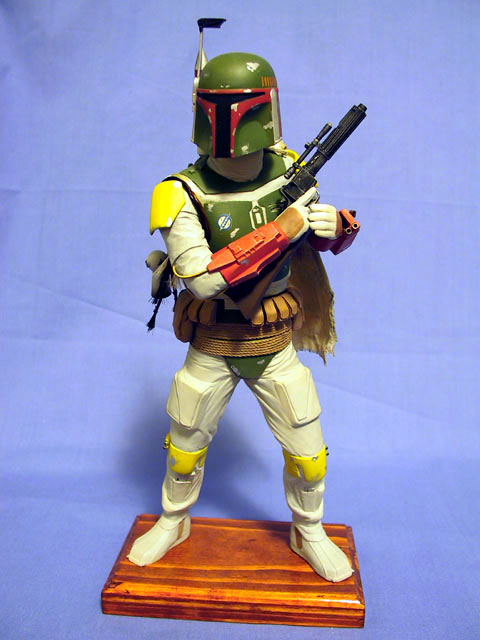
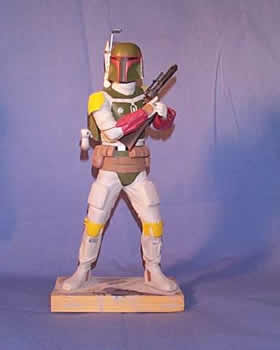
Below is a close-up of the scalps; braided from synthetic doll hair. Also below is the photo of the completed model. The base is the same one in the above pictures, just sanded all the junk off, routed the edges and stained it (click on the thumbnails for the full sized pictures. I'll get around to doing thumbs for the rest of the pictures on this page someday...) |