Home | Model Making | Writing | Photography | Biography | Contact | Links | Blog
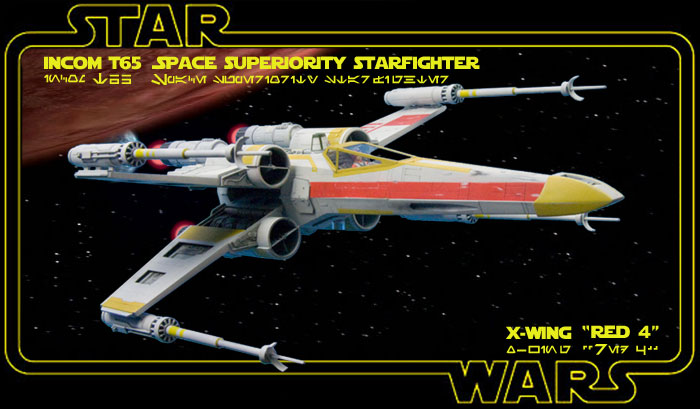
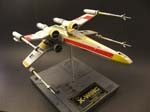
| The X-Wing is the ultimate science fiction spacecraft. Some will say the Star Destroyer from the same movie trumps it, or that the TIE Fighter has more of a unique, other-worldly look. Still others will say the USS Enterprise is the Queen of the Vacuum. They're all wrong. When you absolutely, positively, have to blow up stuff in space, and look cool doing it, you want an X-Wing. I built "Red 4" from the original Star Wars movie*. The screenplay lists her pilot as John Branon, and there's a very brief shot of Branon looking over his shoulders as TIEs blow him to bits, but otherwise the ship doesn't get a lot of screen time. | |
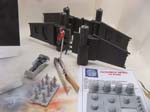
Paints Used
|
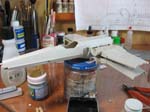
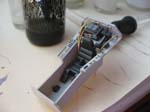
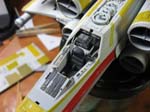
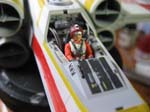
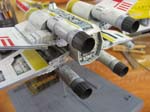
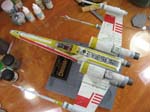
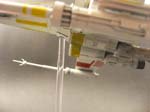
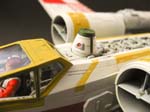
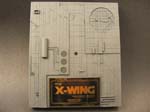
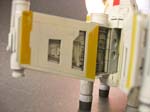
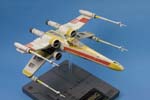
This is the 1/48th scale Fine Molds model. The molding and fit of the kit are excellent. It's actually a snap and screw together kit, but I ended up gluing everything. The only issue I ran into was that I, as a general rule, will assemble parts a half-dozen times to test fit before I apply glue, and with the tight tolerances in this model, I broke a few joints during the process. Nothing that glue wouldn't fix, though. I did need to clamp the upper and lower fuselage together to get rid of a minimum gap, but otherwise the fit was perfect. The model is pretty much out of the box, with the exception of the cockpit, the markings, and the droid. In the cockpit I added bits of spare photo etch from 1/350th scale ship kits in a few places to dress up smooth boxes and surfaces, and I also made some conduit hoses out of guitar string. Simple enough, but it made a huge difference in the look. The droid head is an R5 from an after-market set that's long out of production. It's not entirely correct in that the head should be a trapezoid at the very top and blend down to the circular bottom, but I didn't want to modify such a nice looking detail. Since it wasn't completely correct, I painted the R5's eye copper, just because I love that color and so rarely have a chance to use it. There are photos of the actor who played John Brannon on the internet, and I used those to do some minimal helmet markings. The red color and the white stripe wasn't difficult, but the scalloped detail on the front was too much to handle, so a single black dot made due, and I drew in the arrow shapes on the side of the helmet with a Sharpie. The kit comes with markings for Skywalker's "Red-5", both in water transfer decals and regular peel-and-stick stickers for the kids, but the only decals I used were for the instrument panel in the cockpit; everything else is masked and airbrushed. I didn't want to do "Red 5", Luke Skywalker's ship, as you can't swing a wombat without hitting one of those things. |
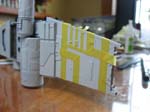
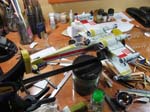
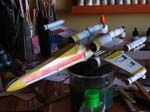
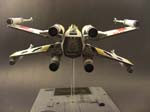
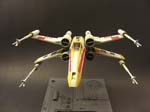
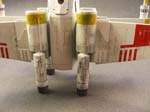
I photocopied the red wing markings and used them as templates to mask off for paint, simply omitting the outermost stripe to make "Red 4". The rest of the colors I arrived at by studying photos of other modelers' renditions of this ship. Photos exist of the filming miniature, but I can't make out I did a lot of shading by first painting everything black and then letting that show through the color coats here and there. I also tried the hair spray technique for the first time: put on your base color, airbrush hair spray, then the next color. Once the top color is dry, you use a wet brush to scrub away at the surface, the hair spray begins to break down, and you get a cool chipped paint effect. Other weathering was done with pastels and pigments. |
|
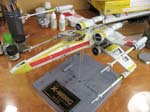
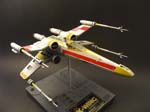
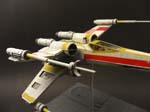
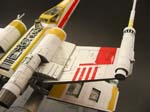
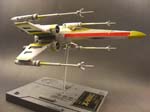
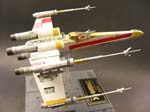
While I had a lot of fun building the X-Wing, I had a complete and total blast doing the display base. I 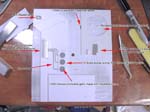 sheeted a square of pine with styrene, and then using a few Death Star surface photos for reference, I started scribing like crazy, and then layering on more styrene, and then more scribing. Small details were added using more photo etch from the spares box, some wire for conduits and plastic tubing to form structures. I designed the name plaque in Photoshop and had John at Ironbound Trophy Center etch it for me. sheeted a square of pine with styrene, and then using a few Death Star surface photos for reference, I started scribing like crazy, and then layering on more styrene, and then more scribing. Small details were added using more photo etch from the spares box, some wire for conduits and plastic tubing to form structures. I designed the name plaque in Photoshop and had John at Ironbound Trophy Center etch it for me. |
|
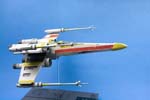
The Fine Molds kit was a joy to build and if it isn't the best designed, detailed, and fitting kit I've ever built... never mind. It is. It's great. A lot of purists have problems with the model as it isn't exactly true to the filming miniatures in certain details, and there are a couple of places that the modeler can enhance the final product by doing some research and adding things here and there (as I did with the cockpit), but overall you just can't beat this model. I'll be building more (as well as their 1/72nd scale X-Wing, Y-Wing, etc.) ~April 2013 |
|
| Photos were taken with my Canon 400D (Rebel Xti) and 50mm fixed lens, and also my Canon SD700IS, as it has a better macro lens. I used my airbrush booth with backing construction paper of both black and blue as the photo studio, lighting it with several external daylight-corrected CFL light sources. Post-processing was done in Photoshop using a gray-card reference shot. | |
| *It's called Star Wars. Not Episode 4, not "A New Hope". Just Star Wars. | |
 |
 |
 |
 |
 |
 |
 |
 |
 |
 |
|
 |
 |
 |
 |
 |
 |
 |
 |
 |
 |
 |
 |
 |
 |
 |
 |
 |
 |
 |
 |