Home | Model Making | Writing | Photography | Biography | Contact | Links | Blog
 |
|
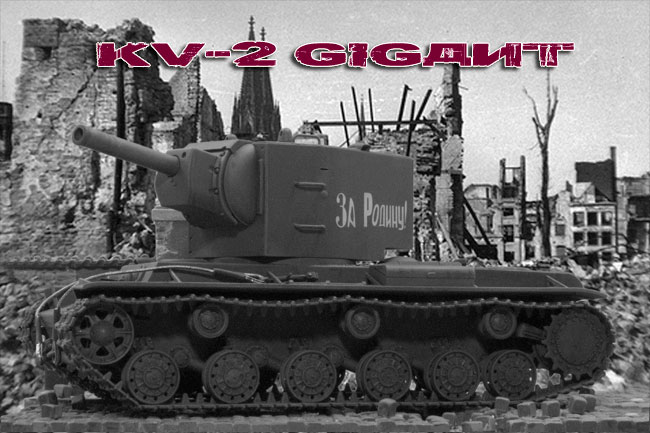
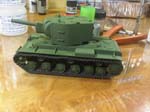
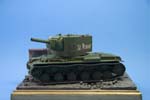
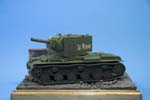
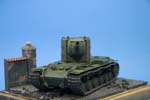
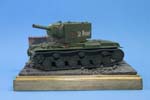
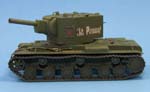
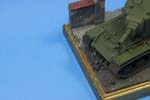
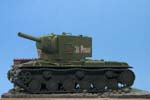
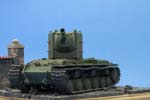
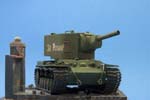
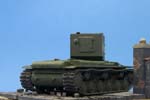
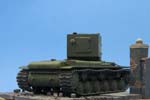
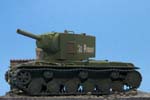
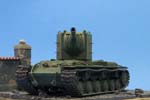
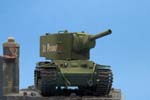
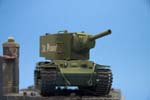
| The Russian KV-2 "Gigant" was a modification of the KV-1 tank, that swapped out the main gun for a 152mm Howitzer gun. The tank was specifically tasked with taking out fortified positions and bunkers, a mission it was well suited for. The high-profile of the turret, the slowness of the vehicle and the frequency with which it broke down, caused the design to be replaced after only a year or two of use. | |
 |
When I was eleven or twelve I spent a week with my Grandmother. This was during the time that I was building one or two models a week, and I finished the 1/700 USS Enterprise I'd taken along for the trip. I needed a fix, so we went to K-Mart or 3D or some other department store and I bought a Monogram Snap-Tite! Patton tank. That was the last and only time I'd built a tank, until now. |
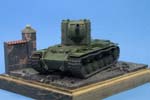
This model was for an NJIPMS group build of 1/48th scale Tamiya armor. I know next to nothing about armor, so I picked this kit because the thing looks like someone took a gun mount off of a ship and put it on treads. |
|
Paints Used
|
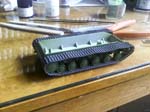
The model was insanely easy to build. I honestly don't think I have more than two hours of "cut and glue" time invested in this. Only a few ejector pin spots to fill, absolutely no seams (even between the metal lower and plastic upper chassis). The treads take some getting used to; it took me over an hour to build them for one side, but I evidently learned something while doing that as the other side took about ten minutes. After base-coating the tank in Russian Green, I did the usual wash with Windsor Newton oil paints, then tried the "Filter" technique, where you put little dots of color on the model and blend them down to nearly nothing, to break up the surface of the subject. I put on too much oil, blended it too much, so I ended up with more of an overall dust effect, but it wasn't bad for a first try. The only issues I had with this were at the very end, and none of it was related to the kit. For the final clear coat I used PollyScale clear flat, and it frosted up like a snow globe sitting on a paint mixer (okay, bad analogy...). To fix that I coated everything with clear gloss again (Future floor polish) and then sprayed it with Vallejo's clear flat. This time I got little white specks all through the finish, even though I strained the paint, etc. At that point it was the night before the build was due, so I got out the sandpaper and started removing all of the white specks and flecks, and there were tons of them. I had an old old can of Testor's dullcoat lacquer spray, so I decanted that, shot it through the airbrush, and all was well. |
 |
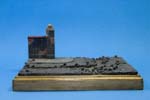
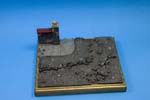
The base is a piece of pine that I had, which happened to be exactly the right size for the broken cobblestone road and sidewalk set that I picked up from Verlinden. I also had a park gate set that I took the column and part of the wall from. I stained the wood, gloss coated it, then stuck the resin road and other bits down with Gorilla Glue. I then painted, dry brushed, stamped, washed, glazed, airbrushed, and did everything I could think of until it looked the way I wanted. It was a lot of fun. |
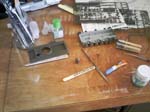
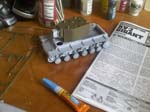
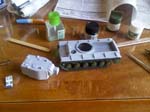
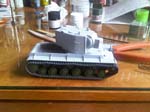
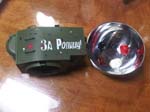
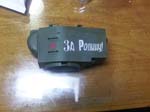
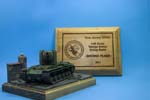
With the problems I had at the end while finishing this, I never thought I'd get it done, and I even came to the point of preparing to strip the entire kit back to bare plastic and starting over again, contest be damned. I was pleasantly surprised, then, when I took second place in the club's contest. I'm really happy how this turned, out, I had a blast building it, and I'll be doing at least one more armor piece in the future. ~August 2011 Note: the following in-progress photos were taken with my Blackberry camera, hence the low quality. The other photos were taken with my usual setup of my Canon 400D (Rebel Xti) with hot shoe flash and 50mm fixed lens. |
|
 |
 |
 |
 |
 |
 |
 |
 |
 |
 |
 |
 |
| |
 |
 |
 |
 |
|
 |
 |
 |
 |
 |
 |
 |
 |
 |
 |
 |
 |
 |