Here’s a “quick and dirty” overview how I built a spray booth that I used for over a decade, until I purchased a purpose-made metal one. This was an idea that my Father suggested to me in the long long ago, while I was in the Navy and traveling around quite a bit. I built a very rudimentary version back then, initially starting with a cardboard box, but then came up with this much improved version after some experimentation. The clear containers are storage boxes of two sizes from The Container Store. It was quite helpful in a small apartment setup, allowing me to spray on most days as the window insert meant that I could vent outside even if it the weather turned nasty. I don’t have the exact numbers, but once I figured this out, it took me 2 hours to build, and total materials were right around $90, which includes the $65 exhaust fan, the two storage containers, and the sheet of plywood that mounts the fan and inserts into the open window.
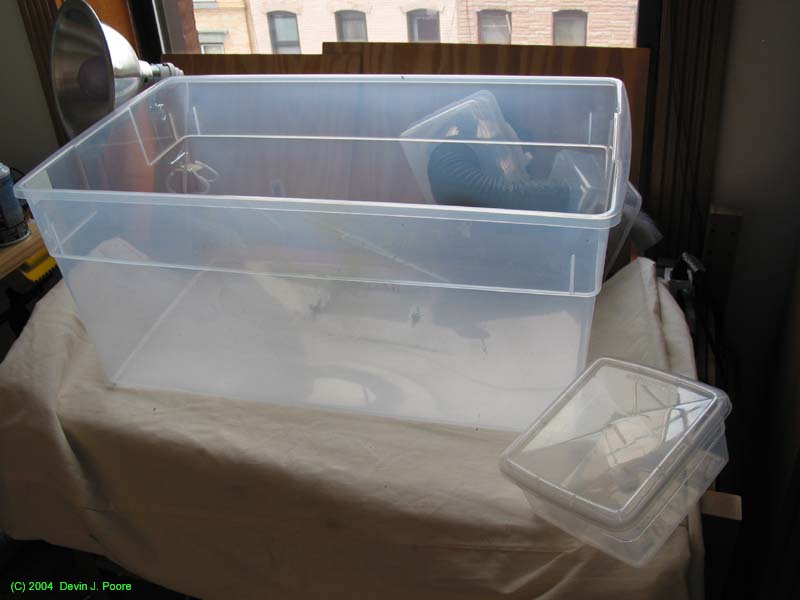
The main components are made up of these canisters. These were purchased at “The Container Store”. I’ve seen similar at other stores, but these really grabbed my eye. they’re clear, for good lighting when painting, heavy duty ABS plastic to stand up to stacking and storage, and after you use them for a while and get paint buildup in them, you can wipe them down with a solvent soaked rag and get them to like-new condition.
The large one is 25″ X 15″ X 12″; large enough for everything up to battleships. I believe the price of it was $13 or less. They make one that is one size larger (can’t remember the exact dimensions) which would be great for larger projects.
I used two of the smaller containers and their lids in this project. This container is about 7″ X 6″ X 3″. $3 each sounds about right for their price (it’s been a while since I bought them).
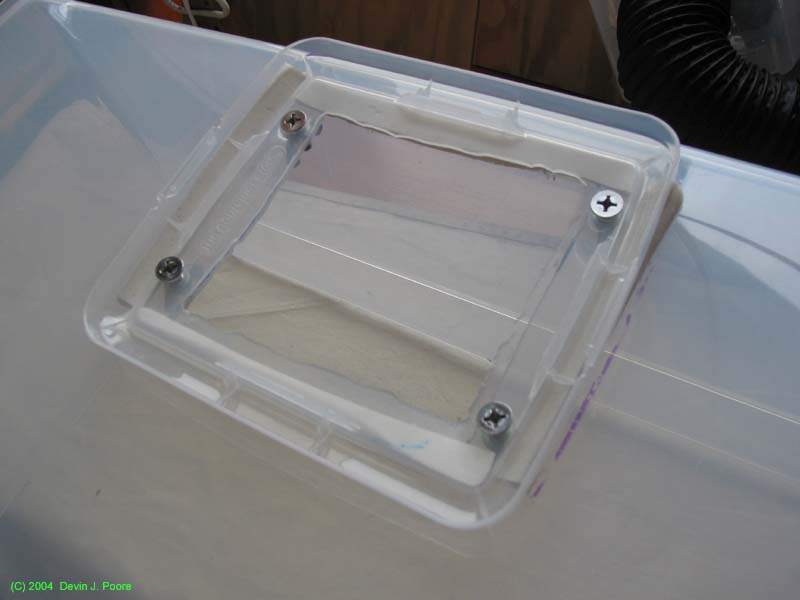
Here we see the back of the large container, with the lid of one of the smaller containers attached. I stuck some window weather stripping between the two pieces, and then bolted them together with bolts and wing nuts to attach them. I used the bolts as double sided tape or adhesive backed Velcro was not sticking very well, and I wanted these components removable for storage. The cutouts in the lid and larger container were made with a Roto-Zip spiral saw bit that I chucked into my Dremel tool. Worked perfectly.
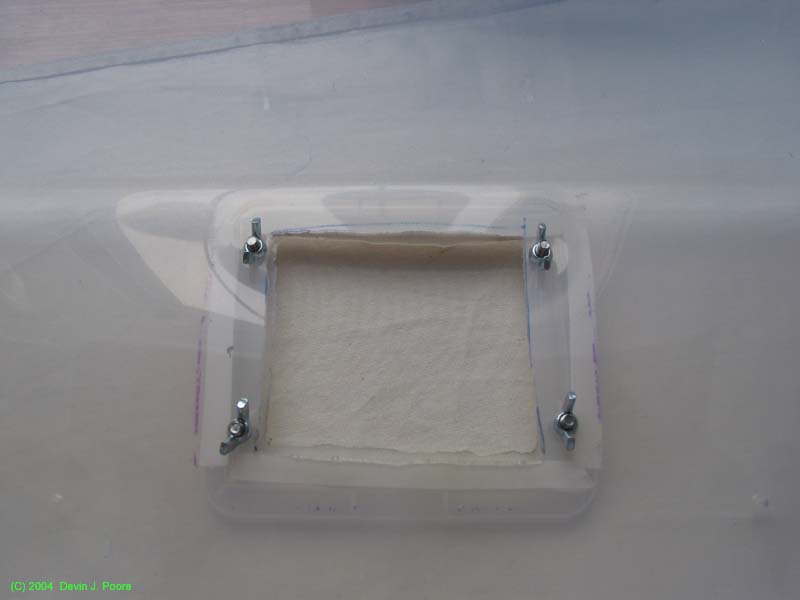
Here is the view of the previous attachment from the inside of the larger container.
The reason for attaching the lid of the smaller container to the back of the larger: now you have a snap-on attachment. The smaller container has had a circular hole cut into the bottom of it. This hole is for the exhaust hose (cut to the diameter of the hose you will use, of course).
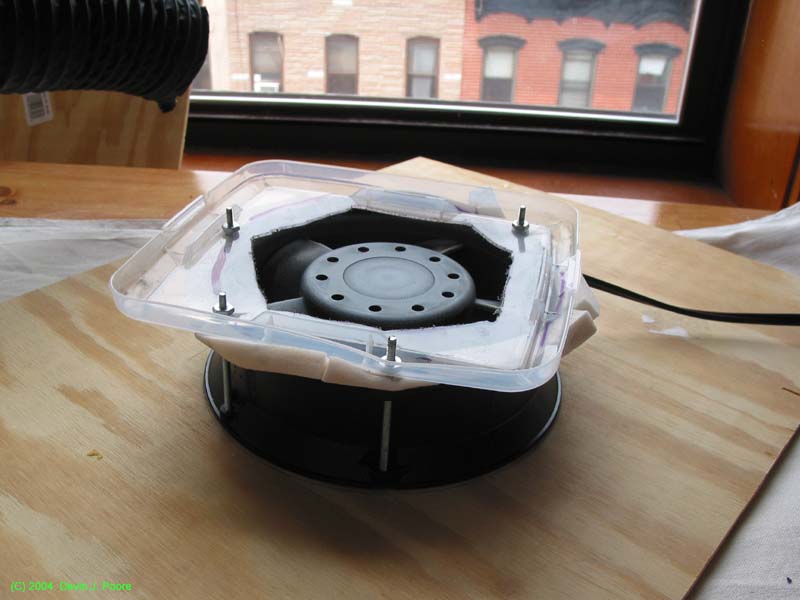
This assembly fits into the window. I find it works better that way (if you put the fan directly on the plastic “booth”, it unbalances the whole assembly).
The plywood sits in the window, lower the pane upon it to hold it in place. The fan bolts directly to the plywood, and I just drilled holes into the lid for the second small container lid and attached it to the same bolts. Window weather seal was added as in the booth assembly, and hole cut in the lid with the Dremel tool.
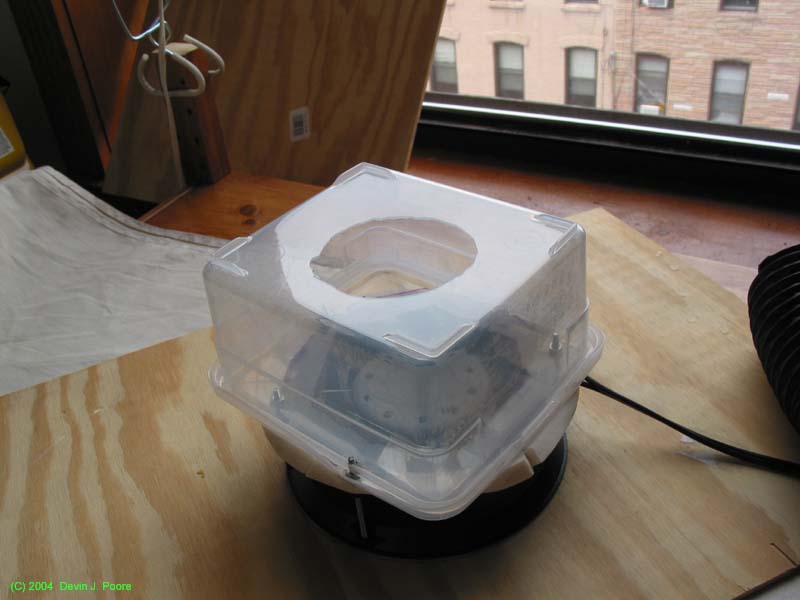
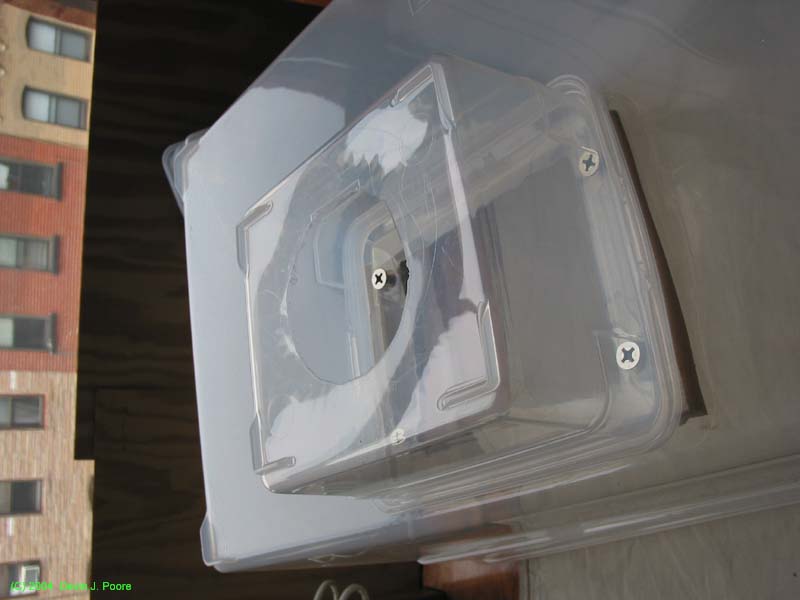
Second container with exhaust hose hole cut, snapped onto the lid.
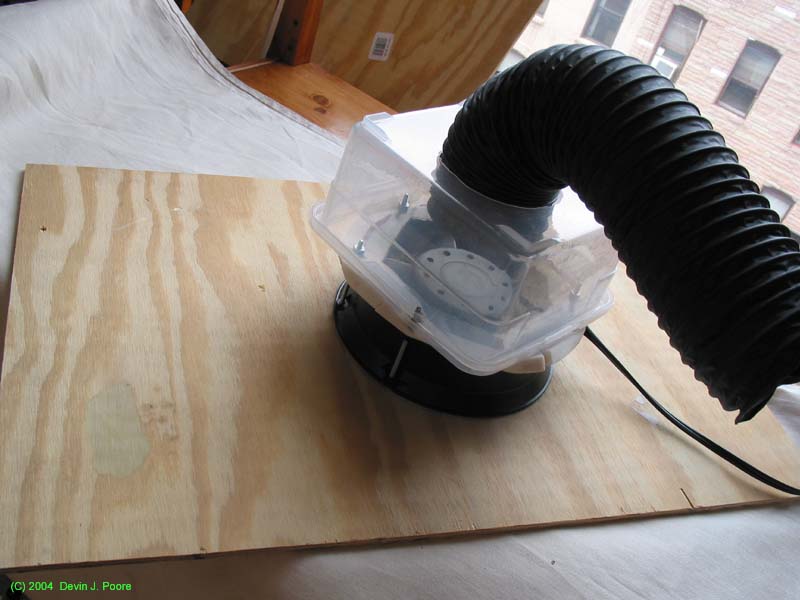
This just shows the previous shot with the exhaust hose inserted.
SAFETY NOTE
I’ve heard over and over and over again that you should NOT set up an exhaust fan setup like this; you are never supposed to have the exhaust pulled directly through the fan, as with solvent based paints there is a chance of the fan brushes generating a spark and lighting off the fumes. I personally think that the odds of this are very low – okay, if you spray pure thinner into the booth for a solid minute, and THEN flip on the fan, you could probably get a nice fire going. I always start up the fan before spraying and let it run for a while after I finish. Never had a problem myself. But, of course, no one else should do this. I’m stupid. There, that concludes the “Cover My Ass” portion of the presentation. Get yourself a nice brushless fan, or an offset squirrel cage setup where the motor is never in the exhaust flow, and you’ll cover all of your bases.
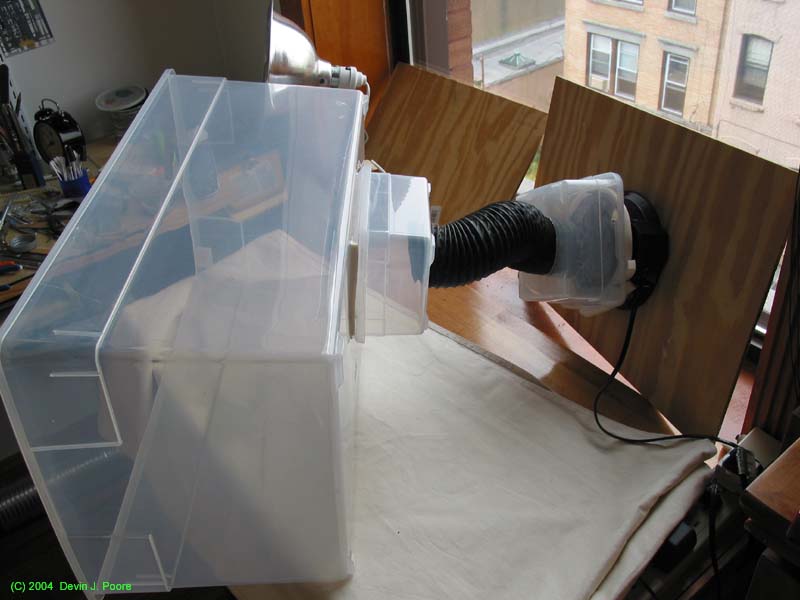
There’s nothing else to say or show. Set your large container on a table, put the fan assembly in the window, and stick the exhaust tubing into the back of the two small containers, and you’re good to go.
Pay attention to the height of the plywood you cut for the fan mount. Mine is short enough that it will fit into the main booth when not in use. That is the reason for using the lids as attachment points for the entire setup, a few snaps and the entire thing breaks down and stores with the large booth. Very neat and tidy when not in use.
-circa 2004