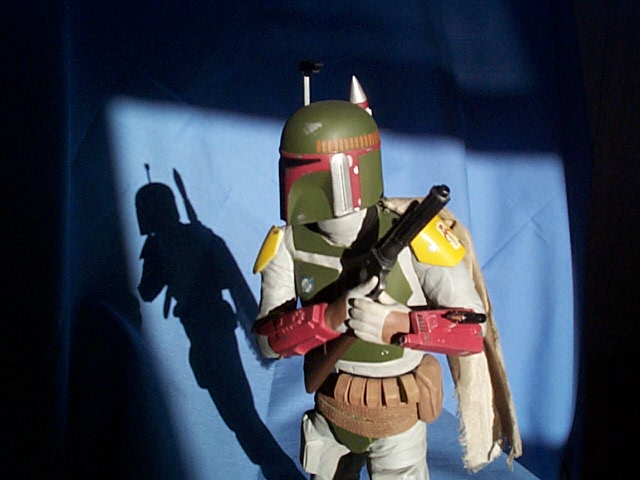
For those of you who do not know, Boba Fett is a character out of the Star Wars trilogy. If memory serves, I picked up this long out of production vinyl kit while going to school in Orlando, right after the Navy, which puts the start date somewhere in the mid-90s. I worked on it in fits and starts over multiple years, but finished it after the turn of the century. Photos are mostly taken with my first ever digital camera, one of the first Kodak offerings. Let’s follow the progress, shall we?
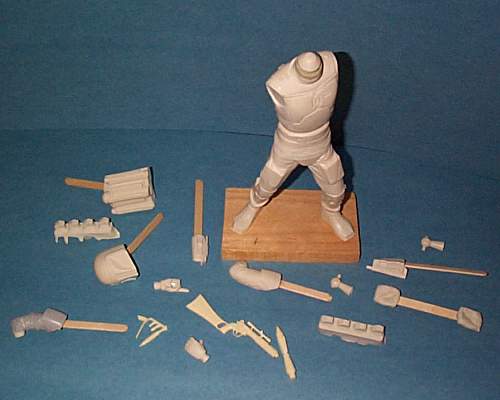
Kit parts. The bulk of them are vinyl, an odd substance to work with. Items such as the blaster, rocket, and a few other detail parts are cast resin. The Popsicle sticks are for manipulating the parts while I’m airbrushing them. I plan on painting most of the parts before assembly on this kit, as the kit is posed with both hands holding his rifle. It would be a bit tricky, for me at least, getting all the parts of both arms to come together at the correct spot if they’re assembled first. (And, yes, I know I need better lighting for taking photos. I’m a workin’ on it).
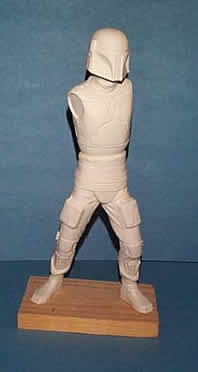
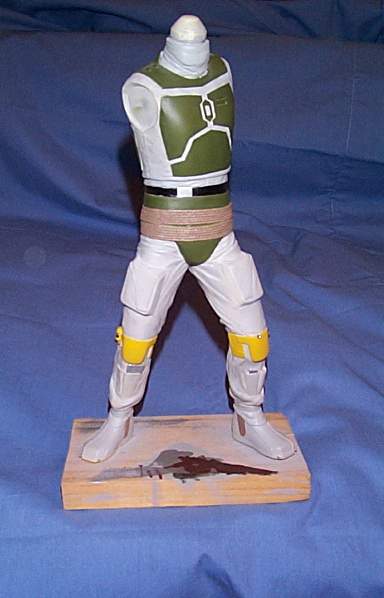
Main torso assembled with head attached. The Boba de Milo? Boots glued to legs, legs to torso. I placed bolts in the bottom of the feet, to secure it to the temporary wood base (and the eventual final base). The whole assembly was then filled with plaster to give it some weight and prevent the sagging vinyl kits are known to go through. I thought he looked quite turtle-like with the neck being as short as it was, so I added about 1/4″ to it before attaching the head. On the right side of the torso I also removed the molded in Wookie scalps, which will later be replaced with braided theatrical hair.
I started painting with the green armor. Unfortunately I have zero recollection of what colors I used, but I do know they were all acrylic, as those work best with vinyl (never use enamels, they don’t dry on vinyl!) Also did the helmet and backpack at the same time (just didn’t think to photograph them). Initial impression on my part is the gray is too light, but I’ll wait until the rest of the colors are laid in before I start adding dark washes to the jump suit.
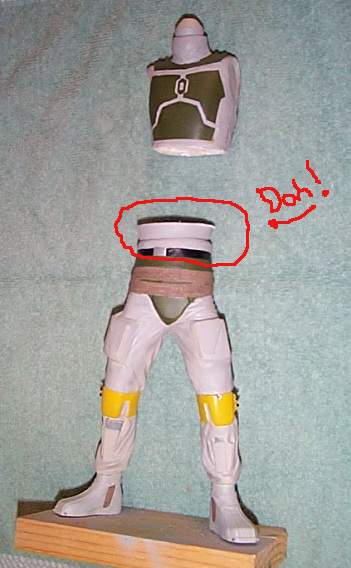
Okay, here’s one of those cases where I say over and over to myself “Why didn’t I notice this before?”, as I repeatedly kick myself. Basically when I glued this kit together several years ago, I didn’t trim quite enough out of it! Fortunately, a little quick surgery removed the offending piece. Above left photo shows the offending area, photo on right shows it removed, and body glued back together. I’d always thought he looked a little too tall, but now the proportions seem right.
The rest of the process involved final detail painting, adding extra bits such as the hoses into his gauntlets fashioned with guitar string, and the Wookie scalps made from braided theatrical hair and beads. The kit’s vinyl cape was replaced with flour sack cloth, stained tan, then soaked in a white glue and water solution so that it draped naturally over the model.


